
I’d been running Home Assistant on a Raspberry Pi for a while. It worked, but “worked” is doing a lot of heavy lifting there. Not everyone in the house had the app installed, the interface wasn’t exactly slick, and the iPad I’d set up on a shelf mostly collected dust. Too much hassle. Pick it up, unlock it, navigate to the right screen, forget it.
The wall tablet dream (and its many problems)
A wall-mounted tablet felt like the obvious solution. But that idea comes with a pile of practical questions: How do you mount it cleanly? How do you keep it powered without a cable dangling down the wall? How do you prevent screen burn-in? It started feeling like more trouble than it was worth. Then I got lucky.
While scoping out the wall, I discovered that the previous owner had drilled a hole through to the electrical cabinet, exactly where I wanted the tablet, at exactly the right height. They’d done it to mount a TV. Sweet!
Finding the right hardware
I picked up a refurbished Lenovo Tab M11 on Amazon. It’s a solid, no-nonsense tablet with a decent screen, and there are dozens of 3D-printable wall mount designs (opens in a new window) available for it. A friend printed one for me, and that part was surprisingly painless.
The cable situation, less so. I needed a flat, right-angled USB-C cable (opens in a new window) long enough to run behind the tablet and all the way to the electrical cabinet. After ordering several options from AliExpress and finding none of them quite right, I ended up soldering two parts together myself. One pigtail USB-A table and a USB-C 2 pin cable without PD support.
Why USB-A? Because that only sends power one way at max 5W and I didn’t want to risk burning the house down by terribly soldering a 45W PD cable. Not glamorous, but it works.
Lenovo also has a built-in battery care mode that keeps the charge between 40–60% when the tablet is permanently plugged in. Small thing, but it means I’m not slowly destroying the battery by leaving it on the charger indefinitely.
Keeping the screen useful
Once mounted and powered, I needed the display to behave sensibly, always showing the dashboard, no Android UI chrome, and ideally only waking when someone’s actually in the room. Fully Kiosk Browser (opens in a new window) handles all of that. It runs apps fullscreen, suppresses the system UI, and can trigger the display based on motion detection. Exactly what I needed.
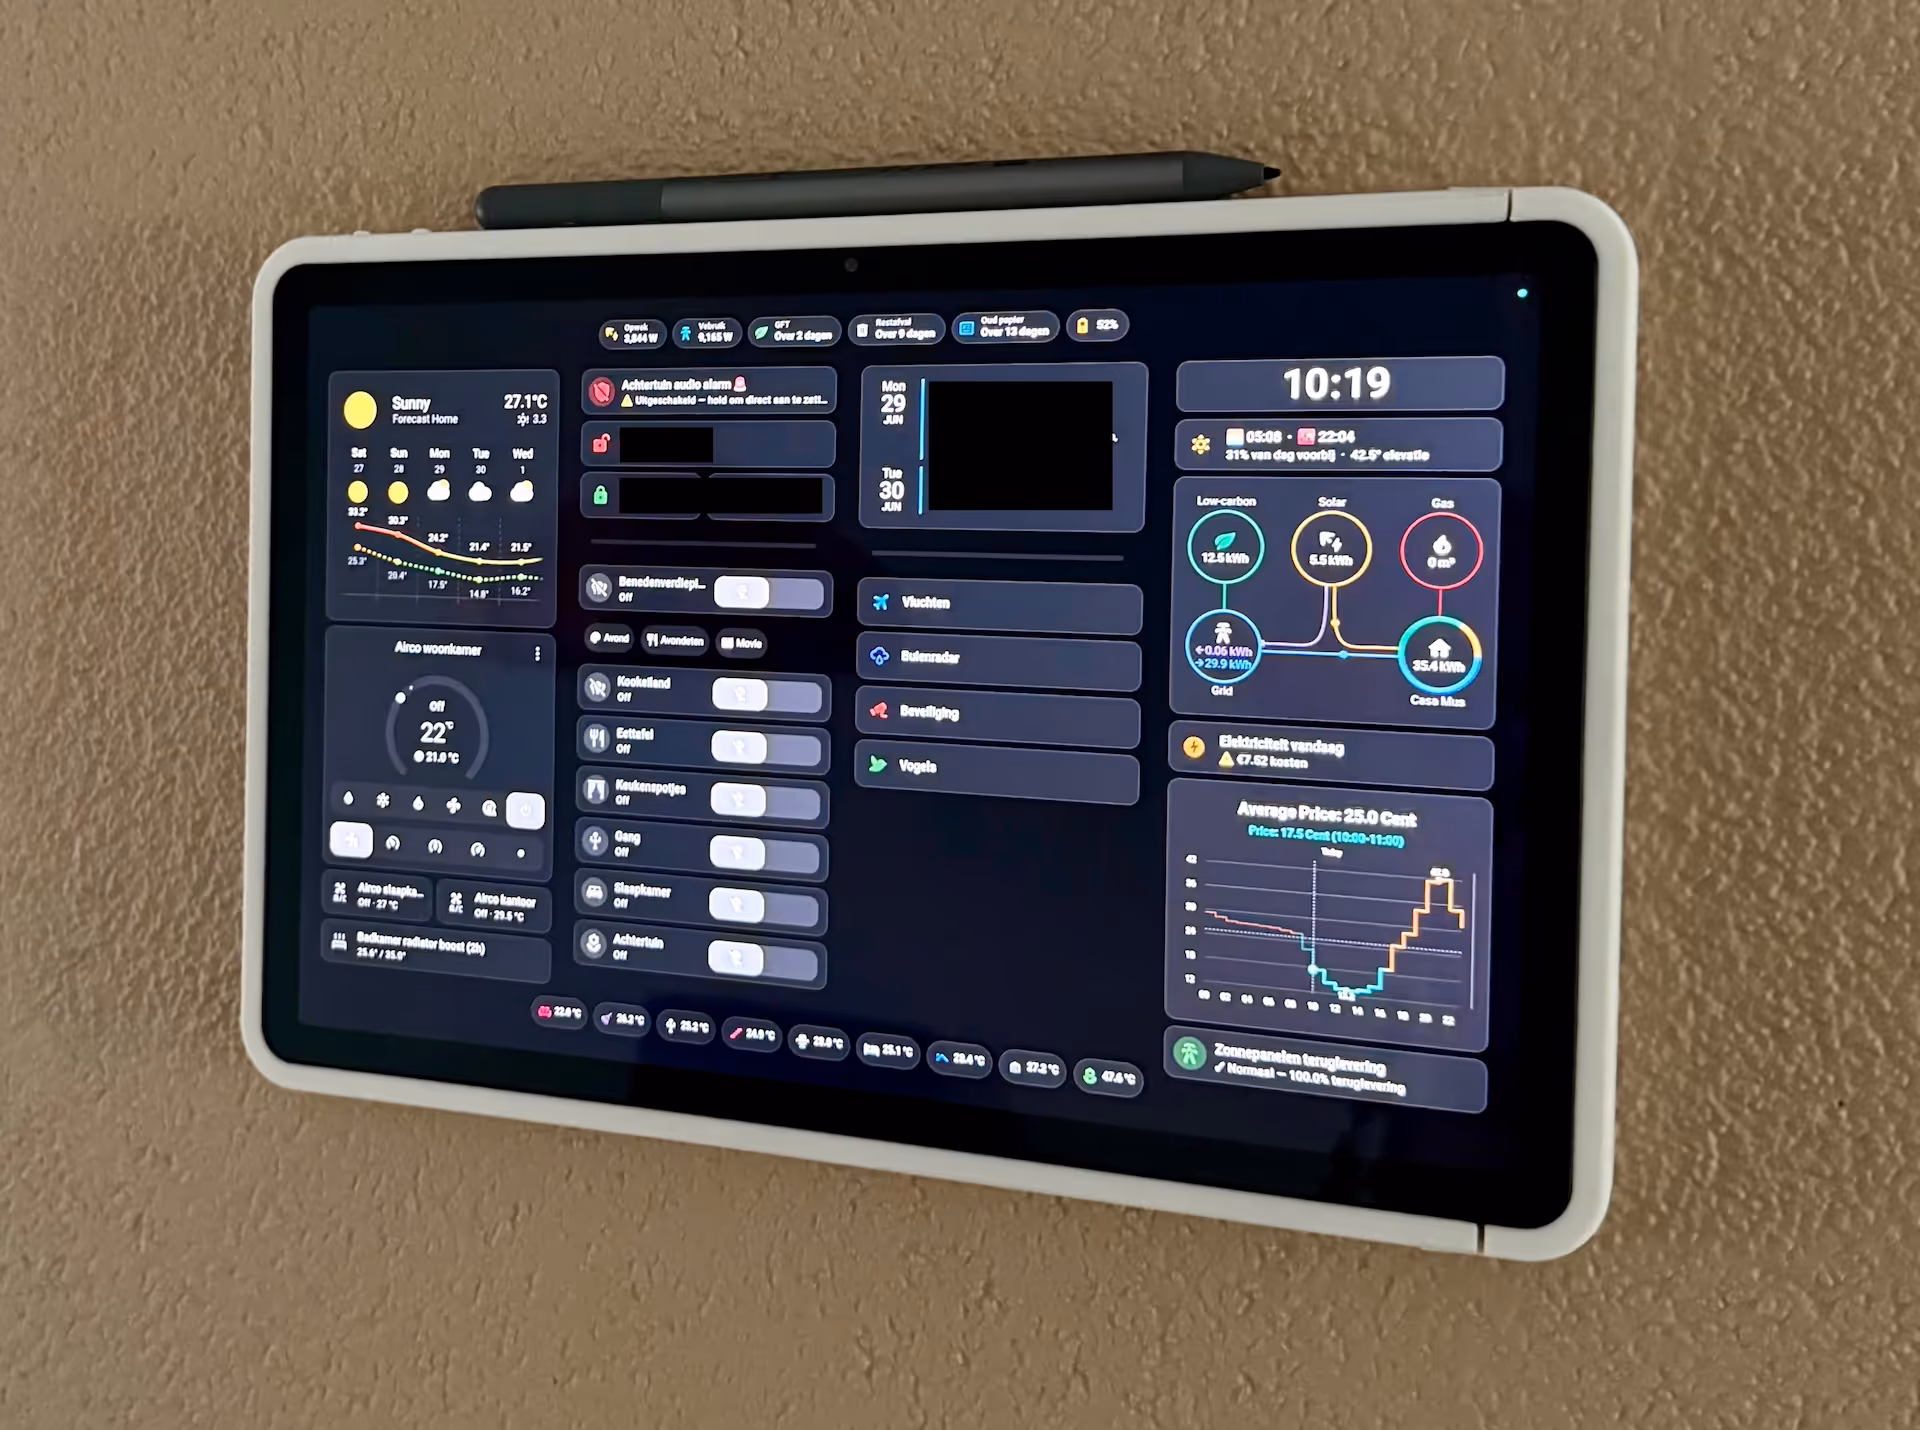
Building the dashboard
This is where the bulk of the time went. Home Assistant gives you enormous flexibility, which is both its strength and its curse. The configuration options are endless.
I used Claude to help build out the dashboard, specifically through the Home Assistant MCP server, which lets Claude read and write the dashboard config directly. Together we put together a layout covering energy consumption, solar output, air conditioning controls, calendar, lighting and more. It saved me a lot of trial and error.
Was it worth it?
Absolutely. It went from a vague idea to a genuinely useful thing on my wall that everyone in the house actually uses. The hardest part wasn’t the software anymore, it was the hardware. Soldering the USB-C cable in this case.